

Quilting Miniatures: Piecing a Sewing Room One Tiny Scrap at a Time Because My Scraps Weren’t Small Enough
- ACreativeCorner

- Mar 7
- 5 min read
How I Accidentally Started a Quilting Town the Size of a Thimble
For Christmas last year I asked for something a little different… a sewing-themed book nook.

Now if you’re wondering what a book nook is, imagine a tiny little world that sits between books on a shelf. It is like a miniature dollhouse and a puzzle into one. It’s like peeking into a miniature room through a window. Some people build tiny libraries, cafés, or fairy houses… and of course I wanted one with sewing.
——————————————————————————————————————————

The problem is I’m not very good at waiting patiently for Christmas morning.
So naturally… I bought a different one before Christmas even arrived.

Enter the World of Tiny Everything

When I opened the book nook kit I received for Christmas, I was greeted with over 180 steps.

I repeat… over one hundred and eighty.

I briefly wondered if I had accidentally ordered a miniature room or enrolled in an electrician class.

But I started where every quilter knows to start:
One piece at a time.

Tiny shelves.
Tiny scissors.
Tiny bolts of fabric.
And when I say tiny… I mean tweezers-required tiny.

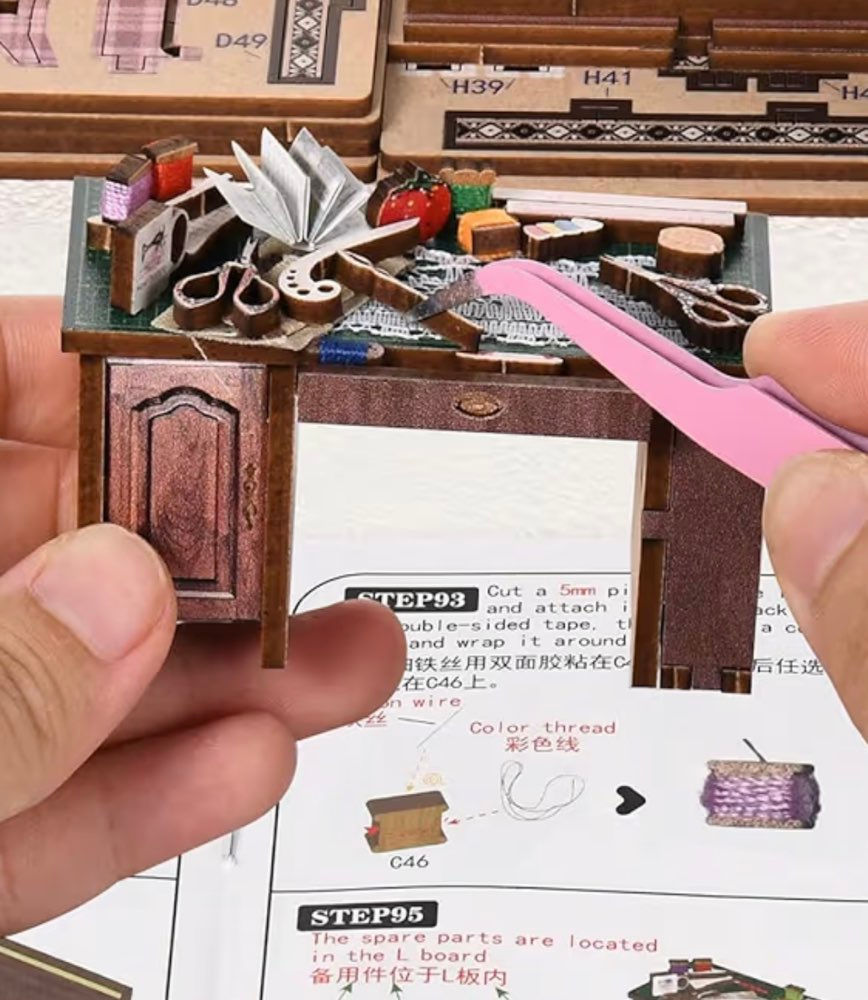
When the Kit Isn’t Quite Right
The kit originally came with a messy tailor’s cutting table, but since I’m a quilter… I couldn’t leave it like that.
So naturally I turned it into a quilting table instead.

That meant creating my own tiny project for the table. I pieced together a 1-inch 4-patch quilt block, which may not sound impressive until you realize those pieces are barely bigger than a fingernail. Do you know how to make an inch quilt block? My solution was to make a larger block and cut it down. I know a waste of fabric but I did find it in my scrap pile.
Seriously… sewing with fabric that small feels a little like quilting with breadcrumbs.

Suddenly the whole scene felt right—tiny fabric squares on the cutting mat, little pieces waiting to be sewn, and a quilting project in progress.
Because let’s be honest…
A sewing room without a quilt block somewhere nearby just doesn’t feel quite right.

See that framed quilt? That is picture of a quilt I actually made for our quilt guild around 2020.

And of course, I couldn’t leave the fabric alone either. The kit included its own fabrics, but when you have a stash, why would you use theirs? So I swapped in some of my own scraps to make the miniature space feel a little more like my sewing room.

Some of the accessories weren’t exactly the right miniature scale, but honestly that just added to the charm.
The Glue Saga
There was a lot of glue involved.
A lot.
At first I used E700 glue because that is what the kit came with. It has a tiny precision tip so I could place things carefully and glue them down. But it takes time to dry. I’m not that patient. But it did come in handy for this book nook, on the other hand the other book nooks not so much.
There were two little problems with this glue. The smell and how long it took to dry. It at least it wasn’t superglue. (Well…wait. I admit I did try superglue and got it all on my hands. (I shouldn’t have superglue in my sewing room or have it easy accessibile). But I did have little clamps and that helped keep the pieces together until they dried.
Let’s just say after putting all the little pieces together, my head started wondering if I was assembling miniatures or floating into another dimension.
So when I started the second book nook (the one I had bought early because patience is overrated), I got smarter.

I used a hot glue gun.
Which worked great…except for the strings of glue everywhere. Tiny glue spider webs.
Everywhere.
I was lucky because my daughter offered to pull as many strings out that she could to clean it up some.

Also I didn’t realize I would be becoming an electrician
Because these little rooms have lights.
Which means wires and battery packs and trying to hide wires inside walls the size of popsicle sticks. And not all my wires are hidden…. please don’t judge.
But when the lights finally turned on… it was magical.

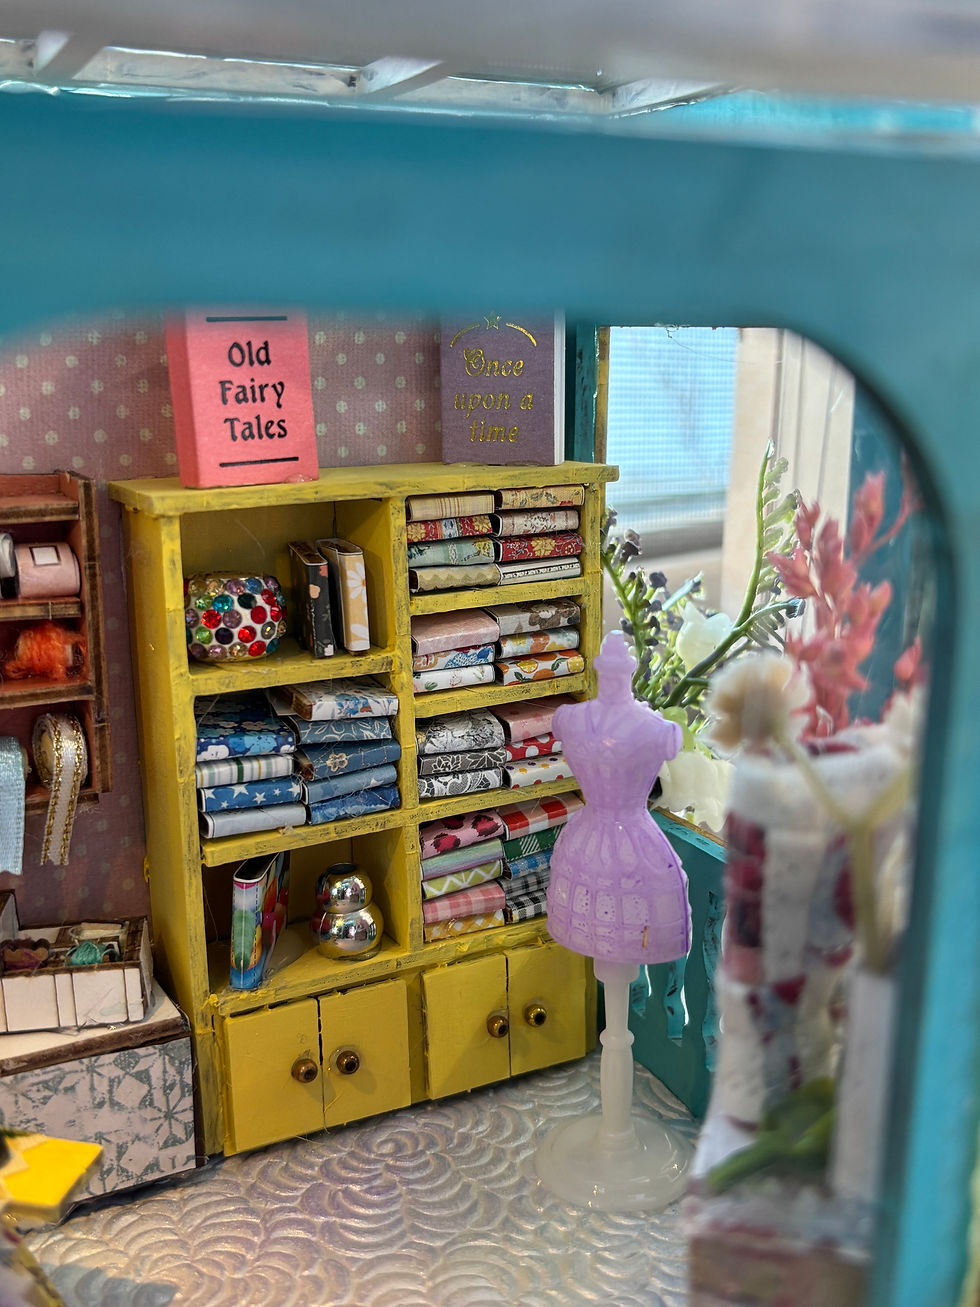
Customizing the Second House
The second house directions wanted me to paint all the edges, which didn’t come out so well for me. I should had used my own paints and who is patient enough to wait for paint to dry.
The original floor was supposed to be a simple paper checkered pattern, but I found some textured scrapbook paper and decided to experiment.
I used some stamp brushs and lightly rubbed them across the floor.
Now it has a soft purple-blue aged look without being overwhelming. It’s hard to see it in the photo below but it’s there.

Instead of displaying a dress in the window like the kit suggested, I made something much more fitting for my world… a tiny quilt of course.

I also added flowers from Hobby Lobby to make the window feel more alive.
The Third Miniature
Then came the third miniature room.

This one was much sturdier and easier to build. The wood pieces were stronger and everything fit together better.
But there was one small problem…It was supposed to be a café.

And while I enjoy a good café, I looked at the accessories and immediately thought:
Nope. This needs to be a quilting space.

So out went the café decorations (well I kept some, a good drink, cake, cookies…Yeah they were welcomed in my sewing room) and in came sewing items, fabrics, and quilting supplies. I even carefully cut around the door to save the door but slipped a new wall behind the door to cover the cafe background. I also made a rotary cutter and a cutting mat on the top of the table.

Now it fits perfectly with the other tiny creative rooms.

The Lesson of the Miniature World
By the time I finished the third one, I told my husband something very serious.
“Do not let me do another one.”
I said that after the first one.
I said it again after the second one.
And I said it again after the third one.
But now Autumn is building a fairy garden miniature…
…and there’s another sewing book nook I’ve been eyeing.
So we’ll see how long that rule lasts.
These miniature builds are incredibly time-consuming. They require patience. Tweezers. Glue and sometimes deep breathing.

But they’re also surprisingly relaxing.


Comments